Thursday, July 11, 2013

Desk Transformation DIY

Well, it only took me a few days and I am FINISHED!!  The desk is done!  When I get excited about a project I get a little one track minded and just want to get to the end.  Now before we get into specifics I must preface this post by saying I honestly had NO idea what I was doing.  The paint was probably wrong, and I probably didn’t sand it down as much as I should have.  BUT I had free supplies and they worked and I’m so happy with how it turned out. 

To begin, let’s look at a before and after shot. :)


Before


After

I started by sanding down every part of the desk.  As I always do when I have a DIY project, I called my dad.  He’s my go-to guy for all things DIY!  He said to sand it down so the gloss was gone, so that’s what I did.  Then I put a coat of primer on it and let it dry for a little while.
 
Sanded, primed, and ready to go!

After the primer dried, I painted the desk with my mint green paint.  Once the first coat was on I realized it doesn't look as green as I thought it would.  A second coat probably would have fixed this, but I’m impatient and I also liked the vintage look with only one coat so I left it.  
My mint green (sort of) desk!!


It needed something more so I went to my other DIY go-to…Pinterest!  That’s where I found a lovely bird silhouette that I loved.  Since I’m poor I decided to skip the stencil and just freehand it.  I think it turned out pretty nicely!


That’s it!  I have some improvements I want to do later on.  I think these drawer pulls would look great on the desk!


And this stenciling would look really cool in the recessed boxed areas of the drawer if I got a darker mint green.


For right now, I am a poor soon to be newlywed and must stop myself before I go spending more money.  Don’t you hate when that gets in the way of projects?  When I’m working and have an income I might make those changes to the desk, but for right now I am enjoying the fruits of my labor.  Now to just get a classroom to put it in!


Monday, July 8, 2013

Long Time, No Blog

Hello friends!  It's been awhile since my last post, and I'm feeling so bad!  Fear not.  I am back with PLENTY to update you about.  Since I saw you last I went on a road trip with my family and got to practice my photography skills.  My skills have improved but I have a long way to go.  Until I can set up a montage of my favorites, this cute face (and one of the pictures I'm proudest of) will have to satisfy your curiosity.


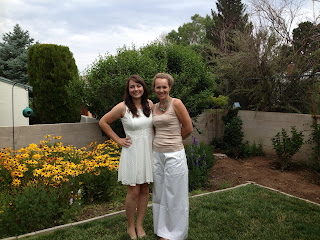
Things have been crazy since I came back to Albuquerque.  With a wedding approaching, showers to attend, and an apartment to move to I've been busy as a bee.  This past weekend my lovely future mother-in-law (pictured below) threw me a bridal shower.  It was beautiful!  I am so grateful to be marrying into such a wonderful family.  We were showered with gifts and felt so loved.  I think my little apartment is going to burst!

With the preparation to move to the new apartment this weekend, I've been trying to figure out what to do with everything.  Some stuff is going with me, some will be given away, and some may be thrown out (hello 2 year old receipts!).  However there is one item I have chosen for a special project.  Presenting...


My new DIY Project!!!!

A family from my church gave me this desk when I moved out of the dorms and in to a house, and it has served me well.  There won't be room for it in the apartment, so I've decided I'm going to give it new life and move it into my new classroom...when I find out what I'm teaching of course.  I cleared everything out today and took out the duck contact paper which won't quite fit the style I'm going for.


Tomorrow I'm going to sand the desk and give it a coat of primer.  The plan is to repaint the desk with some mint green paint I got for FREE when I was student teaching, get new hardware for the drawers (maybe some unique stuff at an antique store?) and then paint the top of the desk with chalkboard paint.  Perfect for a classroom!  It will be good for writing notes to myself so I don't forget things.  I can't wait to see how it turns out, and it's not going to cost much because I got a lot of the supplies for free!!  Woohoo!!  I'll keep you guys posted on the progress and post when I'm finished.  Hopefully it will turn out how I'm imagining in my head! Until next time....